donbot
Members
-
Joined
-
Last visited
Everything posted by donbot
-
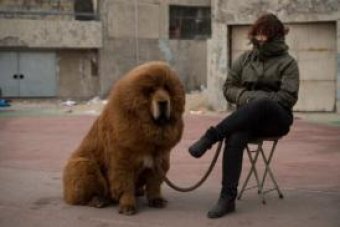
Lindsay Face: 4 Body: 5 How well does she represent the brand? 3 Charisma: 1 X-Factor/Star Quality: 2 Elsa Face: 9 Body: 9 How well does she represent the brand? 10 Charisma: 9 X-Factor/Star Quality: 8
-
-
She looks way too good in lingerie
-
-
+more HAIM, covering Sheryl Crow
-
GTA Online trailer

-
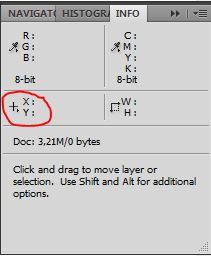
Yes, they show the position of the mouse. But don't worry so much about the position as you're drawing, because you can move it later. Just make sure it's the right size (see the W & H in the info palette). Actually one thing I forgot to mention is that you should make sure you have the "Snap to Pixel Grid" option on. You'll find it in the vector shape options - the button looks like a blob shape in the toolbar up the top, when you have the Rounded Rectangle Tool selected. It's the difference between sharp and blurry edges and will make sure everything lines up properly. So once you have it at the right size, just move it into position using the Move Tool. As I mentioned, you can nudge it 1 pixel at a time using the arrow keys too, and you should be able to tell when it's 1px away from the edge. Hope that helps!
-
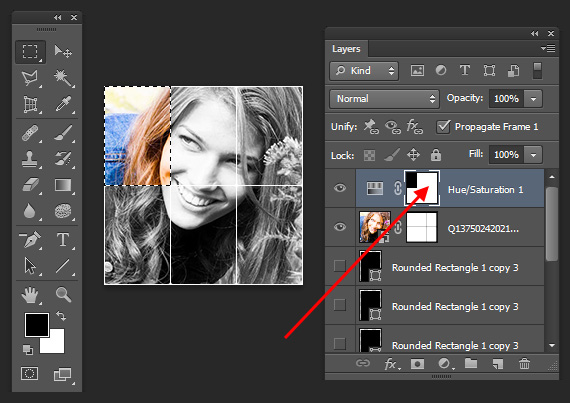
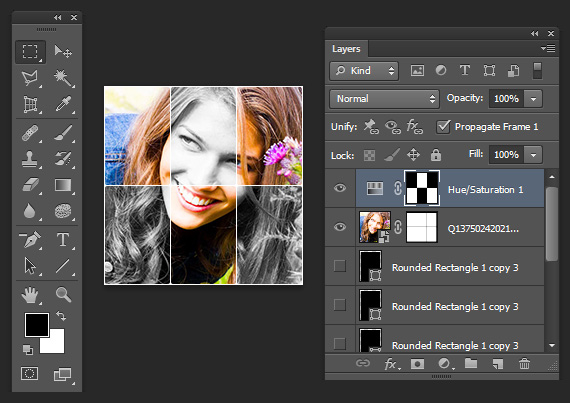
^Same process, but add a second adjustment layer on top of the first one to do the colouring. If the original image is coloured: - Do up to step 12 above - Create a second Hue/Saturation adjustment layer on top of the first one - In the adjustment layer options, click on the Colorize checkbox, then adjust the Hue slider to the colour you want - Do steps 13-16 for the second adjustment layer instead of the first If the original image is already greyscale, same thing but you don't need the first adjustment layer at all.
-
-
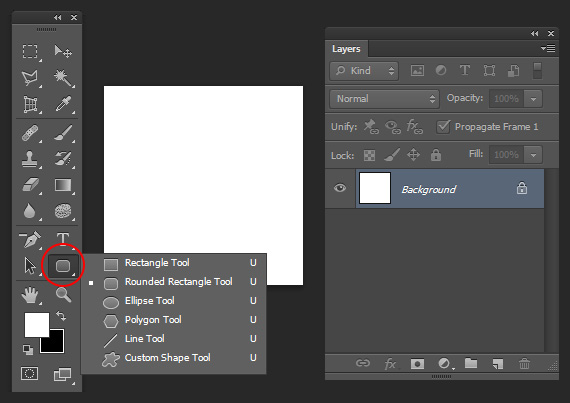
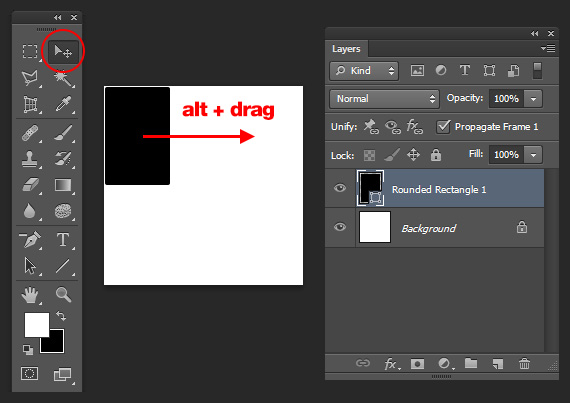
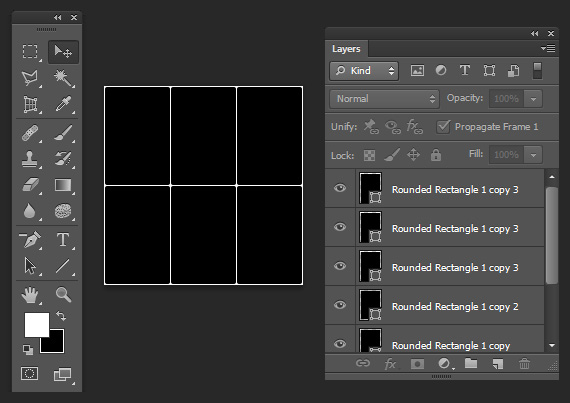
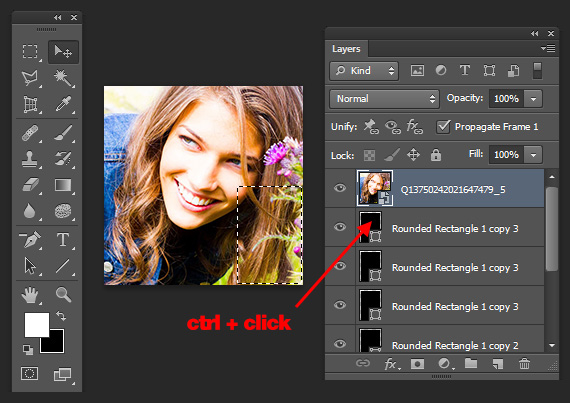
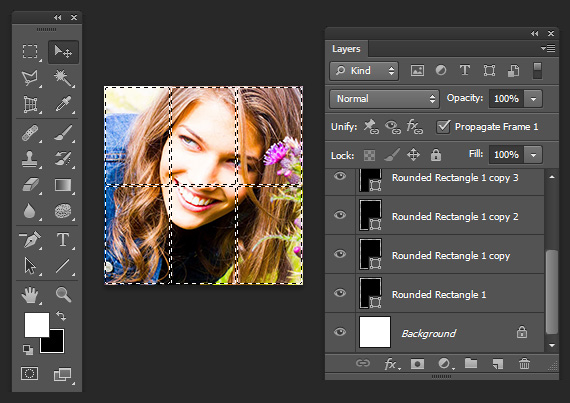
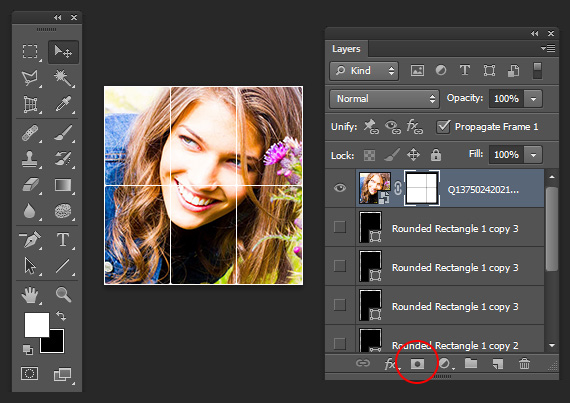
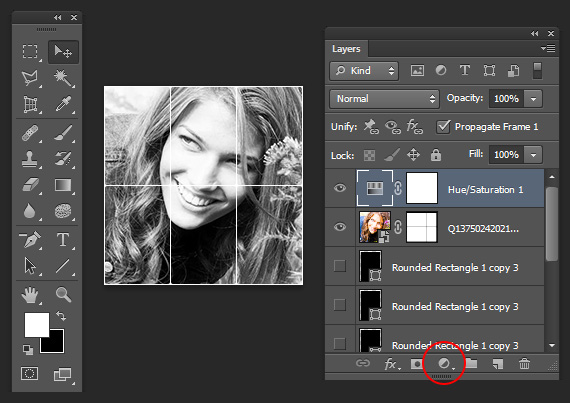
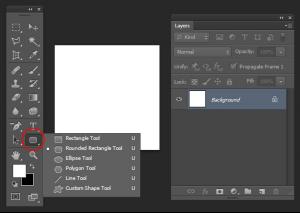
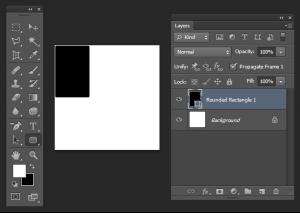
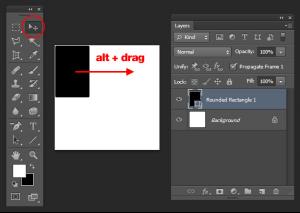
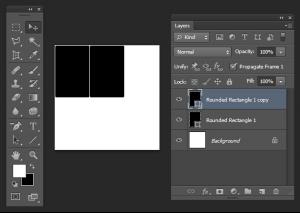
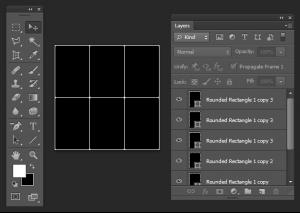
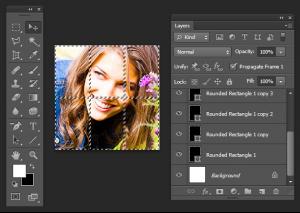
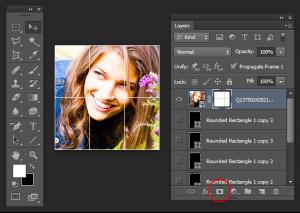
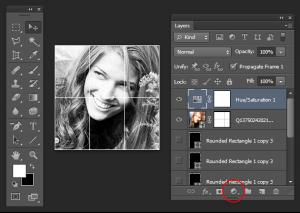
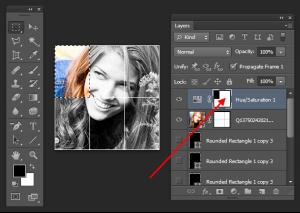
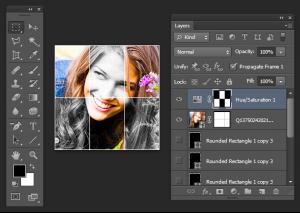
Easy :Dinah: Like with anything in Photoshop, there's more than one way to do it, but see how you go with this: 1. Select the Rounded Rectangle Tool. It might be behind the Rectangle/Ellipse/etc tools. 2. In the toolbar up the top, change the Radius field to 2px. This will control how curvy the corners are. 3. Draw a rounded rectangle on the canvas - doesn't matter what colour. Depends on how anal you want to be with making the boxes even, etc.. but I made the document 199x199 pixels, which fits a 3x2 grid of rectangles that are 65x98 pixels, allowing for 1px between each, and 1px around the edge. You can see the size of the rectangle as you're drawing it in the Info palette (Window > Info), or it might just popup near your cursor as you're drawing (depending on Photoshop version). 4. Once you've drawn the first rectangle at the right size, make sure it's positioned correctly (1px from the top edge, and 1px from the left). You can use the arrow keys on your keyboard to nudge it 1px at a time when you have the Move Tool selected. Then (also with the Move Tool selected), hold down Alt and drag the rectangle to the right. It will leave the first one where it is, and make a copy which you will be moving. Before you let go, hold down Shift, which will make it stay vertically aligned with the first rectangle. Let go once it's in position, and again nudge it if you need to, to make sure it's 1px away from the first one. 5. Repeat the process until you have 6 rectangles. 6. Bring your image in on top of all the rectangles. 7. Hold down Ctrl and click one of the rectangles to load it as a selection. Make sure you click the little thumbnail in the Layers palette (eg. not the layer name). 8. Hold down Ctrl + Shift and click each of the remaining rectangles in the Layers palette - this will add each to your selection. It should look something like this: 9. Select your image layer, and press the Add layer mask button. 10. You can hide or delete all the rectangles now - you no longer need them. 11. Click the Create new fill or adjustment layer button and choose Hue/Saturation... 12. In the adjustment layer options, drag the Saturation slider all the way to the left. The entire image should now be in greyscale. 13. Click on the layer mask of the adjustment layer. 14. Select the Rectangular Marquee Tool and make a selection over the first panel you want to re-colour. 15. Fill the selection black. This will knock out the desaturation in that area. 16. Repeat 14 & 15 over the other panels. 17. Done

-
Um. Wow. :shock:
-
+1 For some reason I expected her to have a deeper voice. Thanks for the adds lebron
-
BrilliantThanks FD & LauraThanks all!Thanks mkThanks FDThank youAmazing shots, thanks gosia & Matute!Is this her first time for VS Swim? Love her profile so much