donbot
Members
-
Joined
-
Last visited
Everything posted by donbot
-
Beautiful shots, thanks Matute (Y)
-
^Some of those outfits o_O She looks spectacular though, thanks Victoria
-
Thanks fd :Dinah:
-
Her profile is so adorable
-
-
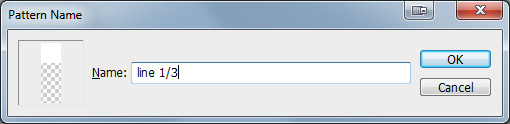
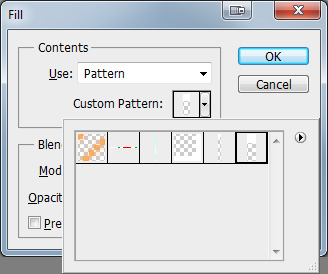
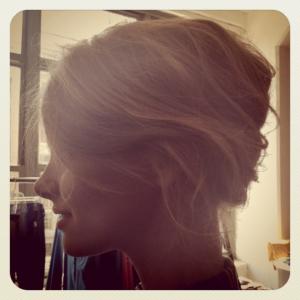
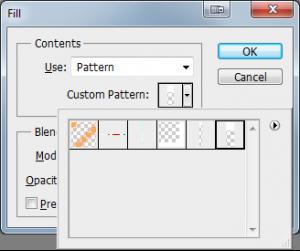
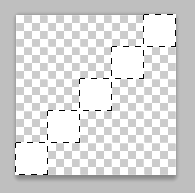
^Awesome When's the album out? I love thisLife Slash Dreams / Dan BlackI was asked how to do the thin line texture on this signature: I thought I'd explain it here so other people could perhaps get something out of it too. It's pretty easy to do by using Photoshop patterns. First you need to decide how thick you want each line, and also how far they are spaced apart. The one above looks like a 1 pixel thick line with 2 pixels inbetween. So to recreate that: - Create a new document with transparent background, 1 pixel wide and 3 pixels high - Fill in one of the pixels of the document white (or whatever you want the colour of the lines to be). The document will be tiny, so zoom right in - It should look something like this: - Select the whole document (Ctrl-A) - Go to Edit > Define Pattern... - You can give it a name if you want, then click OK Now you can apply this line pattern to any other document, since you have it saved. - Open the image you want to put it onto - Create a new layer - Go to Edit > Fill... - In the "Use" drop-down list, select Pattern - Select your saved pattern from the list below that Then there it is - the line pattern over the top of your image. Since you put them on their own layer, you can then lower the opacity down and/or change the blending mode (Overlay gives a pretty cool effect for white lines). You can experiment with different line thicknesses and gaps in the pattern for different effects using If you want to use angled lines like in the first image, still use the same method described above to define the pattern. Then you create a new document that's larger than your image, and fill the pattern in a layer on that document. Then you can duplicate the layer from there into your image, then Ctrl+T to transform/rotate the lines. You need the lines layer to be larger than your image size, otherwise they won't extend all the way to the edge once you rotate it. You can also create a 45 degree line pattern like this: Any other angles can be difficult to get to tile correctly, so it's just easier to make horizontal lines then rotate it later.


 ^They both look beautifulJust a flesh wound^Sorry, I've just been conditioned to always write the artist first Now You Love Me - The Dandy WarholsNicely done TV on the Radio - Blues From Down HereDoutzen 2.5 Laetitia 2.5Edita Vilkeviciute [5] Ariadne Artiles [4]Dioni Tabbers 1 Edita Vilkeviciute 3 Emanuela De Paula 2 Leticia Zuloaga 1 Maryna Linchuk 3The Dresden Dolls - Me and the Minibar Might be a tough one <_<Candice Swanepoel 1 Cintia Dicker 1 Clara Alonso 3 Fernanda Motta 1 Jenna Pietersen 4Thanks bigmax