avadakedavra
Members
-
Joined
-
Last visited
Everything posted by avadakedavra
-
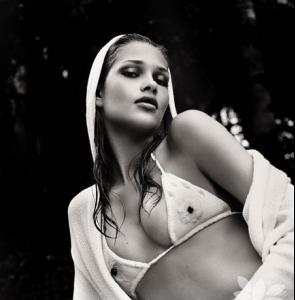
 The angel pictures were posted in, er Lingerie. Do you mean those? And I don't remember. I tend to avoid listening/looking at JLO if I can help it. She makes me twitchy and I'm divided between wanting to strangle her and wanting to plug my ears and start singing to block her out.
 -
In that picture it could almost pass off as her, but go grab a wallpaper from the website and you can see it's not.
-
According to her website, this is from Cia Maritima but I'm not sure if that's true.
-
That's Ana The picture is off her official website. I'll post it in Swimwear.
-
I don't think she's with JLO anymore, and maybe she will be someday. You never know.
-
I want this catalog <_<
-
Kemp Muhl Playlist That's all the videos I have so far.
-
I love this show, but what I hate is that I miss an episode and I'm confused for most of the next. And of course with my luck I've missed half the marathon. <_<
-
Those are great! Oh, and Andi is in a French Connection catalog. She's in ONE of the ads on the site as well, but two in the catalog. I don't quite get that. I'll try to get them scanned soon. I have Ana and Susan stuff to get through first, sadly
-
Black and white photos are about all I like Eugenia Volodina in these days (Y) Nice pics
That was Izabel not Ale
I want to get all the videos I can of Kemp up onto a single place on youtube so that people can just go and look and see how fabulous she is. So far I have these: Music Videos Elefant - Lolita (Director's Cut) Whirlwind Heat - Purple Santana ft. Steven Tyler - Just Feel Better Commercials Vidal Sassoon Japan commercial Anyone have anything they can add to that?
Alright, here's a very drawn out tutorial and I have no idea if it makes sense. Part 1 First, cap the part of the video you wish to use. I took about 40 caps and practically cut them in half. Here's what I ended up with: You now have 1 of 2 choices. You can either build the animation first, or the base image. We'll start with the animation here. Open up photoshop and open up your images. Select the first, and paste each consecutive image on top until you have all your images in your layer pallette like so: Save as a psd (if you so feel. I did because I save everything), then click on the "change to imageready" button on the bottom of your tool pallette. In imageready, create as many frames as you have layers (we can delete some later if needed.) In this case, 31. Next, for each frame, turn on a layer (so for frame one, layer one is selected. frame two, layer two.). Once all the frames are set, select all using shift (click the first frame, hit shift, hit the last frame), then select the speed of your animation by clicking where it says 0 sec. In this case, I chose "other" and set it at .15. To save the animation on it's own make sure to select the "optimized" tab at the top of your window. On the optimization pallette (WINDOW > OPTIMIZE), fiddle with the settings until it's to your liking. Once it's set, go to FILE > SAVE OPTIMIZED AS. Your animation is born. Part 2 As is painfully obvious here, the images for this are kind of horribly dark so we're going to fix that now. If you don't need to do that, skip to Part 3. If you do, keep going. Remember that what I do you will not nesecarily do as there may be different issues with your images. Flipping back to Photoshop, you'll notice the layers are still set up as they were in ImageReady. Here, turn on ALL your layers and starting at the top, start your adjustments. What I did to this image and all consecutive images (in other words, after I finished this, I applied the same settings to the next and the next image until I was all the way through each image, shutting them off as I finished) is this: Brightness&Contrast: 10/40 Color Balance: +20 -8 -10 Curves: 100 150 Desaturate / Fade to 40% There is a certain effect that I am going for, so the coloring I get is on purpose. You may or may not like what those settings do, so screw around until you find something you like. You can feel free to flip back to imageready as we're now going to resize the animation. Using shift again, select all your frames then select the SELECT tool (a box of dotted lines). I want my animation to be squarish so I set my select tool to a fixed aspect ratio. You're free to do as you wish. Once you have the area you want (if you're even cropping), go to IMAGE > CROP. Next, go to Image > Image Size to resize the image. After that's all finished, I end up with this: I may or may not resize it again later. Part 3 We now make our base image. I usually do this in Photoshop and transfer it over, since I have all my pretty filters and brushes easily available. Keep in mind the size of the animation when you're making your base image, and leave a section for it to be put. If you need to resize it again, go to Image > Image Size in Imageready. There's another option, which will be covered later. After much fiddling, this is my base image: I am, however, not done yet. I want to place my animation in that BIG white box, but "captures" of it in the smaller one. So flipping back to imageready, I pick two of the captures that I want, get my textured brush out and end up with this: Part 4 Now comes the fun of putting the animation ONTO the sig created above, and applying that same polaroid effect to it. First, go to your animation in image ready and go to Edit > Canvas Size, making it the size of your base image. With ALL FRAMES SELECTED, create a new layer and move it to the very bottom of your pallette, underneath the first sceen capture, and paste your base image. I've come to notice that my "animation" is a bit big, and also needs to be turned to fit it's area. to do that, link all your layers (when one is selected, there's a paintbrush shape near your image. on the ones not selected, if you click in that area a little 'link' thing will appear. do this on each later), excluding the base layer. Once everything is linked, click on the first little icon by the word "unify" on your layers pallette. This stands for "unify layer position". Which means when one layer moves, they all move. Now, select every frame again, and hit ctrl+t which stands for freetransform. Remember to keep shift held down as you resize. You can release when you rotate the image. Now to put my polaroid in, I create a new layer, this time ABOVE all the screen captures. I paste my polaroid in and get it just so: Next, I delete the black, make sure everything is aligned then save it as a gif as I did with the original image. Here's the final product: NOTE: Do NOT use this sig, it's not for you
Not to argue or anything, but being staff, some people do have to read every post so we can make sure people aren't being nasty. Like someone once posted about some free porn videos. :yuckky: You might not do that, but we have to look anyway. We do have pip threads, is all. So the whole reviving dead threads that have been dead for about two years doesn't make much sense to some people.
She's turning 24.
This is not the place to get a model IDed. Please take it to the model id thread and limit your posts to images or discussion of Adriana Lima.
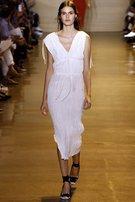
Lela Rose Fall 2005 Ready-to-Wear http://www.elle.com/assets/image/0209200512111649.jpg
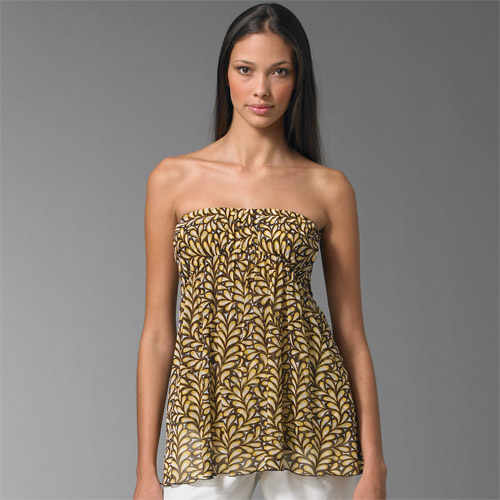
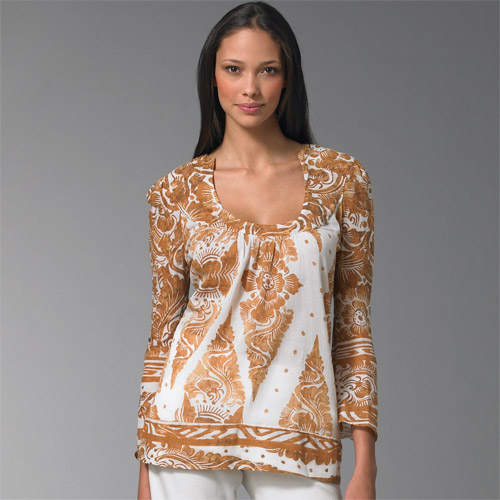
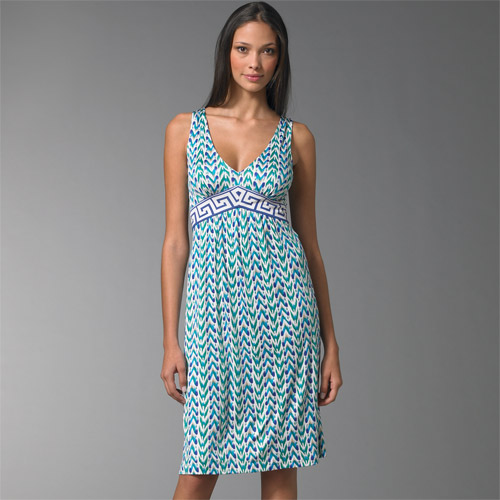
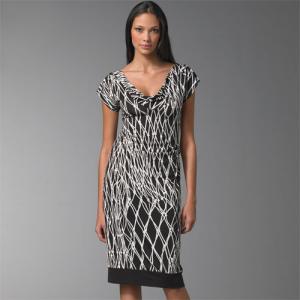
 Saks Fifth Avenue : Diane von Furstenberg
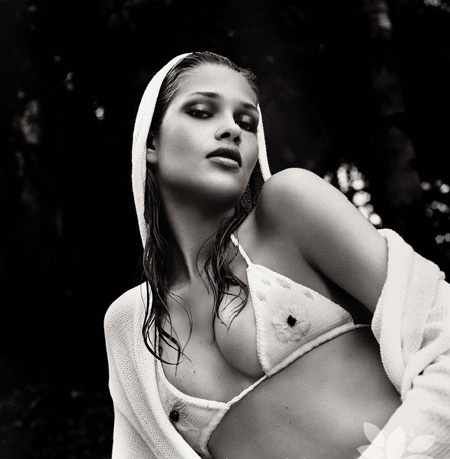
 Someone once compared her Amica editorial to Marla Singer in Haute Couture. And I'm beginning to see it, except Ana is not even close to being the train wreck Marla is.
It depends on if it was optimized or not, the size of the file when it's saved, etc. Usually the crap ones are that way because there's a lot of frames, and it has to be made small for file restrictions, so they lower the quality down. If people honestly want to know how to make those animated inside random images thing, I'll do a tutorial for it. At least try to anyway.
Those images are in the catalog, I think. Which is going to be scanned once I finish Intimisismi and Saks. I'm getting to it, I swear :yuckky:
Angelina Jolie gives birth to baby in Africa No immediate word on the sex of child delivered at Namibian hospital LOS ANGELES - Angelina Jolie gave birth to a baby in Africa on Saturday, according to her boyfriend Brad Pitt's publicist. Jolie was scheduled to give birth to a baby daughter via Caesarian section at a hospital in Namibia, a celebrity magazine had earlier reported on its Web site. There was no immediate word on the sex of the baby. In Touch Weekly wrote that Jolie, 30, had planned to give birth to her child with Pitt at an African resort where they are staying, but doctors told Jolie she would be safer in a hospital.
Especially with something like this, where half the movie is going to end up being special effects.
I just...cannot wrap my mind around Nic Cage being Ghost Rider. I just...his spindley little body just doesn't fit the image for me. Of course the whole idea of comic book characters appearing on the big screen tends to suck anyway, with some exceptions of course.
Someone once compared her Amica editorial to Marla Singer in Haute Couture. And I'm beginning to see it, except Ana is not even close to being the train wreck Marla is.
It depends on if it was optimized or not, the size of the file when it's saved, etc. Usually the crap ones are that way because there's a lot of frames, and it has to be made small for file restrictions, so they lower the quality down. If people honestly want to know how to make those animated inside random images thing, I'll do a tutorial for it. At least try to anyway.
Those images are in the catalog, I think. Which is going to be scanned once I finish Intimisismi and Saks. I'm getting to it, I swear :yuckky:
Angelina Jolie gives birth to baby in Africa No immediate word on the sex of child delivered at Namibian hospital LOS ANGELES - Angelina Jolie gave birth to a baby in Africa on Saturday, according to her boyfriend Brad Pitt's publicist. Jolie was scheduled to give birth to a baby daughter via Caesarian section at a hospital in Namibia, a celebrity magazine had earlier reported on its Web site. There was no immediate word on the sex of the baby. In Touch Weekly wrote that Jolie, 30, had planned to give birth to her child with Pitt at an African resort where they are staying, but doctors told Jolie she would be safer in a hospital.
Especially with something like this, where half the movie is going to end up being special effects.
I just...cannot wrap my mind around Nic Cage being Ghost Rider. I just...his spindley little body just doesn't fit the image for me. Of course the whole idea of comic book characters appearing on the big screen tends to suck anyway, with some exceptions of course.